If you are having issues with the calculation not completing, UNINSTALL and then get the latest version from the App Store. It's critical to UNINSTALL first.
I’m having issues, what do I do?
What units should I use?
How do I set part rotation? / Why are parts not oriented correctly?
No parts are being added - what’s going on?
What are the limitations of the free app?
Where can I get more features?
I’ve subscribed, but I still have limited parts / stock - what do I do?
How do I cancel my subscription?
How do I delete my account?
Where can I read the privacy policy or terms of use?
For best results, numbers should…
See the table below for examples of best practice.
| Ok | Unit | Notes |
|---|---|---|
| 10.5 | Select Decimal from the Options panel | |
| 10,5 | Use [ . ] as decimal separator | |
| 3,000 | Remove thousand separator | |
| 10 1/2 | Select Fraction from the Options panel | |
| 10 1/2' | Do not use notation | |
| 3' 2" | Convert to inches, do not use notation | |
| 3' 2.5" | Convert to inches, do not use notation | |
| 3' 2 1/2" | Convert to inches, do not use notation |
Decimal or Fraction units can be set in the Options widget.
By default, all stock and parts start off oriented with the longer side in the horizontal direction.
The order of the L / W inputs has no impact on rotation.
Parts will be rotated so the longer side is in the direction of the arrow.
When describing the sides of the stock or parts, each side has a label for easy reference. These are used for edge banding, trim, and anywhere you need to indicate a particular side.
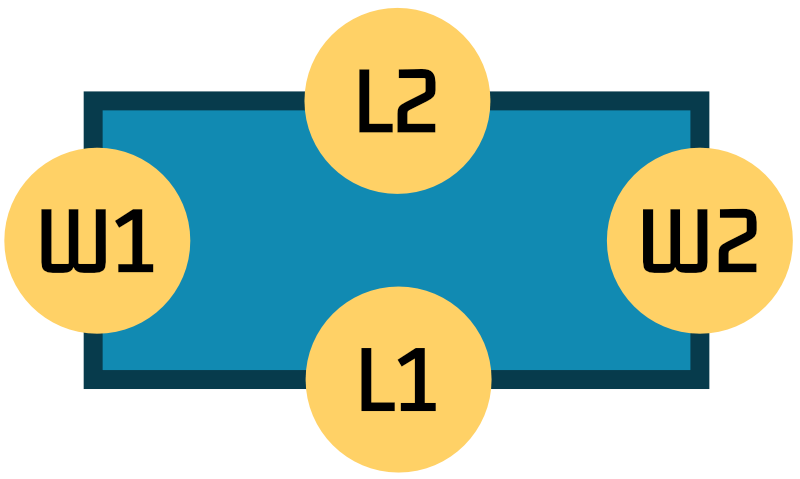
This was updated in February 2023 to be more in line with industry standards.
| Symbol | Meaning |
|---|---|
| L | Length - the longer of the two sides |
| W | Width - the shorter of the two sides |
| Q | Quantity |
The order of the L / W inputs has no impact on rotation.
If you wish to orient the parts, use the orientation lock settings (shown in the small box in the Parts section of the Inputs widget), or use the button to set part rotations based on the L / W order.
Edge banding can be applied to each side of each part.
To understand the side references (L1, L2, W1, W2), see Side References.
Banding is visualized by thick lines in the inputs panel and small squares around the edges of the main visual.
The stock can be trimmed. This allows a clean line to be produced around the edges.
To understand the side references (L1, L2, W1, W2), see Side References.
There are several stock type options:
There are several cut type options:
There are several cut preference options available with the Guillotine cut type:

This setting is designed for guillotine cutting machines such as table or beam saws when ripping stock.

Use this setting if you prefer guillotine cross-cuts - for example, when using a miter saw or a cross-cut sled on a table saw.
The same options are available as for length cuts.

This is ideal if you’re using a jigsaw, laser cutter, or CNC machine. The algorithm prioritizes layouts with the minimum number of cuts and the least waste.
The key for banding and various other elements is included in the PDF.
See Side References for more information.
Cancelling your subscription is done via Apple.
Please use the official documentation.
The first thing to do is check you’re on the most recent version of the app. Click here to check the app store.
If you’re up-to-date and still having issues, please email us at hello@cutrevolution.com or use the live chat feature on this page.
We’ll get back to you quickly and usually fix it within a few hours.
Please don’t leave us a bad review until you’ve given us a chance to make things right.